Table of Contents
ToggleProofing bread might sound like a mysterious ritual reserved for baking wizards, but it’s actually the secret sauce behind that perfect loaf. Imagine biting into a warm slice of homemade bread, the crust crackling and the inside soft and airy. That delightful texture doesn’t just happen; it’s all about letting the dough rise and develop flavor.
What Is Proofing Bread?
Proofing bread refers to the process where yeast-fermented dough rises. This step occurs after mixing and kneading, allowing the dough to develop flavor and texture. During proofing, the yeast consumes sugars, producing carbon dioxide bubbles. These bubbles create the light and airy structure characteristic of well-made bread.
Typically, proofing happens in two stages. The first stage is bulk fermentation, where the entire dough rises in a covered bowl for several hours. This phase aids gluten development and creates flavor complexity. The second stage involves shaping the dough and allowing it to rise again, often called the final proof. This ensures the perfect loaf with excellent volume.
Temperature and humidity significantly impact the proofing process. Ideally, a warm, draft-free environment promotes optimal yeast activity. Dough may take from one to three hours to proof, depending on various factors like recipe and ambient conditions. Patience is essential, as under-proofed dough may lead to dense bread, while over-proofed dough can collapse.
Many bakers use a simple test to determine readiness. A finger gently pressed into the dough should leave a small indentation that slowly springs back. This indicates that the dough has risen sufficiently.
Understanding proofing enhances bread-baking skills. Knowing how to manage this crucial step leads to consistently delicious results. Each loaf benefits from proper proofing, showcasing improved flavors and textures that make homemade bread irresistible.
The Importance of Proofing Bread
Proofing bread is essential for achieving the desired qualities in a loaf. It not only allows dough to rise but also enhances overall flavor and texture.
Enhancing Flavor and Texture
Enhancing flavor and texture occurs during the proofing process. During bulk fermentation, enzymes break down starches into sugars, contributing to the bread’s complex flavors. The fermentation process allows gases to develop, creating a light and airy structure. A well-proofed loaf often features a crispy crust and a soft interior, resulting in a delightful eating experience. Achieving this balance requires patience and attention to the dough’s behavior during proofing. Properly proofed dough also ensures that the gluten structure forms effectively, leading to a superior final product.
Importance of Yeast Activity
Importance of yeast activity cannot be understated in bread making. Yeast converts sugars into carbon dioxide and alcohol, which causes the dough to rise. Factors like temperature and humidity significantly influence yeast performance; warmer conditions typically accelerate activity while cooler ones slow it down. The right proofing environment encourages maximum yeast activity, resulting in a well-risen loaf. Monitoring this activity is crucial; under-proofed dough lacks volume and flavor, while over-proofed dough can collapse. Ensuring optimal yeast activity through proofing guarantees consistent and delicious results in homemade bread.
Methods of Proofing Bread
Different methods exist for proofing bread, each playing a crucial role in developing the loaf’s characteristics. Proper execution of these methods ensures optimal flavor and texture.
Bulk Fermentation
Bulk fermentation marks the first stage of proofing. During this phase, the entire dough rests in a covered bowl, allowing yeast to activate effectively. Enzymes break down starches into sugars. This conversion enhances flavor complexity. Dough typically rises to about double its size, indicating sufficient fermentation. Temperature influences yeast activity here, with warmer conditions promoting faster fermentation. Monitoring the dough’s elasticity assists in determining its readiness. A well-fermented dough feels supple and springs back gently when pressed. This crucial stage lays the foundation for a well-structured loaf.
Final Proofing
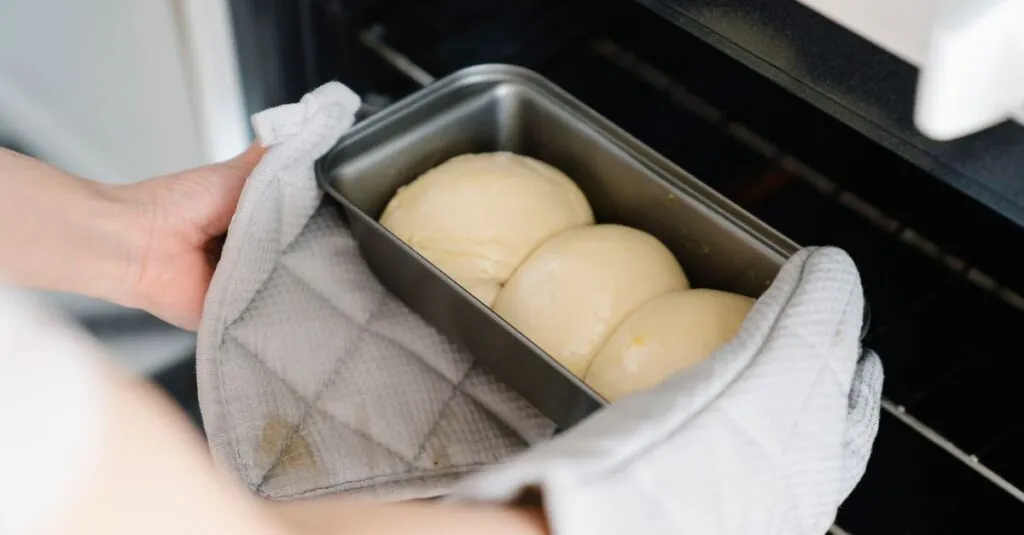
Final proofing occurs after shaping the dough. This step enables the formed loaf to rise again, which fine-tunes its texture. The dough’s surface can appear slightly domed, signaling readiness. A hot, humid environment encourages yeast activity during this stage. Checking for adequate dough rise can simplify timing; the finger test is effective, ensuring the impression remains visible. Ideally, the dough should rise until it’s nearly doubled. Final proofing allows gases to expand, contributing to a lighter crumb structure. Focus on this step ensures the resulting loaf has an enticing crust alongside a soft interior.
Common Mistakes in Proofing Bread
Proper proofing is vital, yet common mistakes can occur during this stage. Understanding these pitfalls enhances bread-making skills.
Under-Proofing
Under-proofing happens when dough doesn’t rise enough before baking. Insufficient rising leads to dense texture, lacking the lightness desired in a loaf. One sign of under-proofing is dough that springs back quickly when pressed. Successful proofing requires patience, allowing the dough to double in size, which typically takes one to two hours. Failing to monitor temperature may also result in sluggish yeast activity. Adequate warmth and humidity encourage optimal fermentation, so ensuring the right environment is crucial. Observing the dough’s behavior offers clues. If the dough doesn’t expand sufficiently, it needs more time to develop flavor and structure.
Over-Proofing
Over-proofing occurs when dough rises for too long, leading to structural collapse. The signs indicate over-proofed dough feels overly soft and bubbles form on the surface. When yeast exhausts its food supply, the dough can lose its ability to hold gases, resulting in a flat loaf. Maintaining attention to the dough’s size can help avoid this mistake. Typically, dough should rise until it’s nearly doubled but not beyond that point. Environmental factors can also play a crucial role, as excessive heat can accelerate fermentation. Keeping a close eye on the clock and using the finger poke test reliably prevents over-proofing. This balance ensures a beautifully risen loaf with the perfect texture.
Tips for Successful Proofing
Maintaining the right temperature for proofing enhances yeast activity. Aim for a range between 75°F and 80°F, as warmth encourages fermentation. Placing dough in a warm, draft-free area also supports proper rising. When humidity is high, consider using a damp cloth over the dough to prevent crust formation.
Monitoring dough size proves vital during proofing. Expect the dough to roughly double in size throughout the process. Observing the dough’s behavior during this phase serves as a guide to its readiness. Using the finger poke test provides a straightforward method for checking; the dough should spring back slowly.
Adjusting proofing times according to the environment remains essential. In warmer conditions, dough rises faster, while cooler temperatures require extended proofing durations. Shaping the dough and allowing for the final proof directly influences the texture of the finished loaf. Watching for surface bubbles indicates an active fermentation process.
Avoiding common mistakes ensures successful proofing. Recognizing signs of under-proofing, such as rapid springiness when pressed, helps minimize issues. Over-proofing, on the other hand, results in dough that appears overly soft, with visible surface air bubbles. Paying careful attention to these visual cues helps achieve the desired loaf qualities.
Incorporating regular checks throughout the proofing duration promotes a quality loaf. Adjusting timing based on environmental factors plays a key role in achieving optimal results. Adopting a proactive approach helps bakers become more attuned to their dough’s needs. Successful proofing ultimately leads to bread with delightful flavor, texture, and a perfect crust.
Mastering the art of proofing bread is essential for any home baker seeking to create the perfect loaf. By understanding the nuances of yeast activity and the impact of temperature and humidity, bakers can elevate their bread-making skills. The key lies in patience and observation, ensuring the dough rises adequately without falling into the traps of under-proofing or over-proofing.
With practice and attention to detail, anyone can achieve a beautifully proofed loaf that boasts a crispy crust and a soft interior. Embracing these techniques not only enhances flavor and texture but also transforms the baking experience into a rewarding journey of culinary delight.